All You Need to Know About The Inflatable Island in Subic, Olongapo City, Zambales
 |
How to Get There?
- Ride a bus from Victory Liner Terminal in Caloocan, Cubao, or Pasay going to Iba, Zambales or Sta. Cruz, Zambales and ask the driver to drop you to The Inflatable Island or Samba Bluewater Resort.
- Ride a bus from Victory Liner Terminal in Caloocan, Cubao, or Pasay going to Olongapo City, Zambales. From the Olongapo City terminal, you can ride another bus going to Iba, Zambales or Sta. Cruz, Zambales, or ride a blue jeepney, or ride a tricycle and ask the driver to drop you to The Inflatable Island or Samba Bluewater Resort.
- You can bring your own vehicle and search "The Inflatable Island" on Waze or on any online map, or map apps. They have a wide parking area for free! However, it is on a first come, first serve basis.
You may want to check the Victory Liner's website to book an online ticket in advance. Schedules available for online booking were limited to few time slots only, you may check their full trip schedule here, or call on their hotline numbers indicated there as there were also special trips which was not indicated on their website. However, all trips that were not included in their online booking website must be bought on their designated terminals. You can also be a chance passenger but the possibility of standing all-throughout the trip is very high.
We were supposed to bring a car, but I realized that I might get tired in The Inflatable Island and might not be in the mood to drive going back to Manila, which really happened when we went there, so we decided to take a bus.
We were going to take the 8:00AM slot for the floating playground so we checked the first and last trip of the bus going to Iba, Zambales and Olongapo City, Zambales from Cubao. Initially, our plan was to take a bus going to Iba, Zambales since this was a more convenient trip as you don't need to transfer to another vehicle to get to The Inflatable Island. However, the last and first trip of the bus going to Iba, Zambales were not suitable for our timeslot in The Inflatable Island, which were at 9:00PM and 5:00AM respectively, way too early or too late for our slot, so we decided to take the 2 rides commute bound to Olongapo City.
We arrived at the Victory Liner terminal at Cubao at around 10:30 in the evening on the 8th of December, the last trip bound to Olongapo City was at 11:30PM, however, the seating capacity of that bus was already occupied, so we had to wait for the first trip on the next day which is at 1:00 in the morning. The fare going to Olongapo City is P240.00. While waiting for the next trip, we had our dinner at the Chowking near the terminal, it was the only fastfood we saw near the terminal, and it is open 24 hours. We also bought some of the things we might need at the 7 Eleven nearby. Afterwards, we want back to the terminal to charge our phones for free on their charging station, however, it was on a first come, first serve basis. At exactly 1:00 AM, the bus left the Victory Liner Cubao Terminal. Usually, the trip bound to Olongapo City from Manila takes 3-4 hours, however, 1:00 AM trips from Cubao bound to Olongapo City takes SCTEX which made our trip a bit faster than usual. It was just more than 2 hours of bus ride when we arrived at the terminal of Victory Liner at Olongapo City. It was around 3:20 in the morning when we got there so we decided to take a rest first at the terminal since it was still too early, we also had our phone charged again on their free charging station. At around 4:00 in the morning, we realized that we could not sleep anymore, maybe its because of our excitement and our sleeping position in the terminal was not that comfortable, so we decided to take a breakfast. There were four fastfood restaurants near the terminal which is open for 24 hours, they were Jollibee, McDonald's, Chowking, and Dunkin Donuts. Ministop convenience store is also present near the terminal. We decided to eat at McDonald's and we ate our foods slowly to be able to stay there until around 5:30AM. We went back to the terminal afterwards and we caught the bus which was leaving at 6:00 in the morning. It was an ordinary bus bound to Iba, Zambales, but it will only cost P18.00 if you will drop by The Inflatable Island. The trip from Victory Liner Terminal on Olangapo City to The Inflatable Island only took around 10 minutes since there were still no traffic that time. You may also take a blue jeepney which will cost P10.00 or hire a tricycle for a higher price.
 |
| The Inflable Island - Ticket Booth |
Tickets
- Unless you're a resident of Zambales, Bataan, or Pampanga, or it is your birth month, buying walk-in tickets shall be the last thing you should do as the tickets bought through walk-ins are the most expensive:
- Splash Pass (two hour pass on the floating playground) - P799.00
- Spray Pass (four hour pass on the floating playground) - P1,099.00
- Soaked Pass (ten hour pass on the floating playground) - P1,499.00
- You can book through their website in advance to save P100.00
- Splash Pass (two hour pass on the floating playground) - P699.00
- Spray Pass (four hour pass on the floating playground) - P999.00
- Soaked Pass (ten hour pass on the floating playground) - P1,399.00
- Metrodeal offers Spray Pass or four hour pass which costs P1499.00 for two persons or P749.50 per person which will save you P249.50 than buying directly to their website. You may check it here.
- Travelbook offers the cheapest online ticket for the Inflatable Island pass. However, their prices varies depending on the date of your visit and their vouchers' availability. You may check their vouchers here.
- Occasionally, The Inflatable Island offers discounts for Zambales, Bataan, and Pampanga locals. The last offer I saw for their resident neighbors was 50% off on their walk-in rates which can be availed through walk-in on a weekday by showing a valid ID with an address - one valid ID can buy ten discounted tickets. For their updated promotions, you may check their website or their facebook page.
- They also offer free birthday tickets for your whole birth month as long as you bring three of your paying friends. I'm not sure though if they always offer this promo, you may check their website or their facebook page for more details.
We bought our Spray Pass (four hour pass on the floating playground) tickets at Travelbook which costs P2,136.24 for three persons or P712.08 per person. This was inclusive of whole day entry to Samba Bluewater Beach, Floating zoo (animal floaties), and the Bali Inspired Lounge.
The Inflatable Island's ticket booth opens at 7:30 in the morning. We arrived there at around 6:10 in the morning so we have to wait for more than an hour in the ticket booth. There were no waiting area, nor chairs to sit in the ticket booth area so don't go there as early as we did. The most ideal time to be there is at 7:00 in the morning so you will still be in the front of the queue of the ticket booth without waiting for a long time before the booth opens.
If you will be taking the morning pass at the floating playground which starts at 8:00 in the morning, you should be there not later that 7:30 in the morning to have an ample time for the orientation and your preparation, unless you get there with your swimming attires and sunblocks on.
Make sure that you secure your wristbands before leaving the ticket booth. These wristbands will serve as your ticket to enter the floating playground, floating zoo, and the Bali inspired lounge. Each wristband is color coded depending on your timeslot and the type of pass you avail in the floating playground. It must be kept worn all throughout your stay in the floating playground as it will determine when you should stop using the playground. Though it looks easy to break in water, don't worry about it too much as these wristbands were made of a special type of paper that don't easily get torn on water.
Step One: Orientation
After getting your wristbands on the ticket booth, take a walk on the path provided by Samba Bluewater Resort, and follow the street signs which will lead you to The Inflatable Island. If you get lost, just ask the guards for directions, they are all over the area and they will willingly help you to get there.
The first thing you should do when you get there is to go to the orientation area where a facilitator will inform you the do's and don'ts, and other things you need to know in The Inflatable Island which includes but not limited to the following:
Step Two: Secure Your Things
After your orientation, you can now secure your belongings in the locker. The locker area can be easily seen from the orientation area. These lockers can be availed however on the booth behind the locker area, besides the souvenir shop. Your facilitator can guide you where you can avail these lockers since the booth can't be seen from the orientation area.
There were two types of lockers which can be rented in The Inflatable Island - the small lockers and the big lockers. If you brought a small bag with you, or you didn't brought a bag at all and you just want a secure place to leave your valuables such as wallet and gadgets, then a small locker might work for you. Else, if you brought a Herschel 25L bag like me, or any other bags with the same size or bigger, or you just want a big space to leave your belongings, then you should rent a big locker. However, bringing a bag bigger than mine is not advisable since I had a hard time to fit my bag on the locker, I have to remove some of its contents and put on the smaller divider of the locker just to fit my bag inside of it.
These lockers can be rented in two options - half day rental (four hour rental) or whole day rental -with the following prices:
If you are worried about where to leave your keys when you are in the floating playground, worry no more as you can leave them secured on the booth where you rented the lockers.
Regarding your slippers, you can do the same thing that we did. We leave our slippers together with our towels, and sunblock on the Bali Inspired Lounge, this also secures us a slot for an umbrella in the lounge. There were some who leaves other things such as sunglasses on the lounge, this is just fine as there were really no rules on what things can you leave on the lounge but leaving valuable things on this area is not advisable, however, there were still some who leaves their whole bag in the lounge, you can also do this but in your own risk, anyway, there are security guards, staff, lifeguards, and other personnel around the area which made it a bit secured.
Step Three - Get Your Lifevest
Once you're done with the orientation, waiver signing, securing belongings, wearing proper outfit, and putting sunblock, its now time to go to the step three - getting your lifevests. This is the last step before going to the floating playground. The lifeguards in the lifevest area are there to help you wear your lifevests properly.
In this area, security guards and lifeguards will also check your: (1) attire if it is included in the proper attire for the floating playground, (2) your jewelries if there are any - it should be removed, (3) and the things you will bring in the floating playground such as selfie stick - it should not exceed 1 feet.
Official photographers of The Inflatable Island are also in this area to get some pictures of you while you are in The Inflatable Island. The photos they took can be bought in the souvenir shop, besides the locker rental booth, afterwards. A picture in a photo paper costs P100.00, while a photo magnet costs P150.00, you can also ask for a softcopy of your picture to them.
Step Four - Enjoy!
Before actually doing the activities in the floating playground, you might want to stretch out first as there were some activities that might make you feel like working out and might give you body pains later, it will also help you prevent or atleast lessen the possibility of having cramps while in the water.
For me, the most ideal time to enjoy the playground is in the morning while the sun is not too hot which might make you feel exhausted easily. It will also give you the freedom to do what you want, with an ample time remaining later, after your timeslot in the floating playground, including taking of pictures while the natural lighting from the sun is still present.
Be friendly, especially to your lifeguards as they were the ones who will guide you on how to do a certain obstacle. They will also help you back to the floating playground when you fell on the water, take note that it is not an easy thing as there were no ladders that you can hold on to go back to the floating playground. These lifeguards will also make things lighter with their funny hugot lines that they come up in almost everything they see, so you better be friendly while you are there.
Stay Safe!
There were obstacles in the floating playground that requires safety precautions when doing because injuries may arise when not done carefully. Even though there were a lot of lifeguards around The Inflatable Island to guide us in every obstacle, it is still better to start precautions with yourself. But sometimes, there are some accidents that couldn't really be prevented, because accidents happen unexpectedly, that's why there is a clinic to give you first aid in case there were incidents like this. This clinic is not only for those who were involved in the accidents on the floating playground, if you have other medical concerns while you are on The Inflatable Island, don't hesitate to reach out the clinic no matter how small or big it is. I had a minor wound on the floating playground, and they really took care of me, one of the lifeguards even assisted me to go to the clinic to get my wound healed.
Relax!
After your timeslot in the floating playground, don't go home yet, maximize your whole day pass in the Bali Inspired Lounge, Floating Zoo, and Samba Beach to relax. The reason why for me, the morning slot is the best time for the floating playground, is to enjoy the rest of the place without the time limiting you after your floating playground timeslot. Perhaps, there were a lot of Instagram worthy spot on The Inflatable Island, and just right after the morning pass the natural lighting brought by the sun is good, take advantage on it to level up your Instagram game while no one is limiting you.
Also, for me, a beach trip wouldn't be complete when you haven't get your skin tanned, so on the afternoon, while the sun was still up high, and my colleagues were resting under an umbrella on the Bali Inspired Lounge to protect their skins, I lay down on one of the floaties on the floating zoo to have a sunbathe and get my skin tanned equally having no tanlines on my arms.
Cleanliness
The natural color of the beach sand there is gray which is the reason behind the dark color of the beach water. But if you look closely on the shallow areas of the beach, you can see that the water is very clean and clear. You can even see some water species there such as stingless jellyfish and other fishes which is a sign of the cleanliness of the water in there. Even on the shore, you will be able to see holes where small crabs came out when there is no people nearby. Don't worry about these crabs as they are also afraid of people, they go back to their holes when people go nearby.
The Inflatable Island has a clean quick shower area good for atleast 12 persons. They also have a spacious building built for shower rooms, and comfort rooms. You might want to enter this building or a full shower after your day in The Inflatable Island. The shower rooms inside this building have separate cubicles from the comfort rooms. Both shower rooms and comfort rooms are well maintained when we went there, there were even personnel that were seemed to be assigned in maintaining the cleanliness of the area. The only dirt that we saw inside that building were sands brought by us when we entered there, but there were times that we were asked to clean our foot and slippers before entering the building to prevent the sand from coming inside when they just cleaned the area.
Food and Drinks
Bringing outside food and drinks will require you to pay a corkage fee which starts at P500.00 for 1-7 persons. This is quite expensive as you can already buy a meal for 7 persons in that price. However, the foods and drinks inside The Inflatable Island are even more expensive, your P200.00 won't make you feel that you've eaten enough to make you full (or is it just me?) since this was just the price range of a serving of fries and a lemonade. This made us decide to look for other place to eat for our lunch. We went outside the Samba Bluewater Resort and The Inflatable Island but we only saw a small store, so we went back inside the resort and we saw a store and eatery near the villas of Samba Bluewater Resort which offers a meal for just P60.00. This store and eatery can be seen from the pathway of the resort.
The Staff
From the ticket booth staff up to the lifeguards, they were all friendly and accommodating! Since we arrived a bit too early, we have to wait for more than an hour before the ticket booth opens. So to let the time pass by, we had a chat with the security guards on the ticket booth and the entrance of the pathway to Samba Bluewater Resort and The Inflatable Island, little did we know the staff on the ticket booth already arrived and was ready to accept guests.
After getting our wristbands from the ticket booth, we went to The Inflatable Island but we could not see where the orientation area is. The man sweeping the dried leaves from the trees approached and asked us if we were finding for something, we said that we were finding the orientation area and he lead us the way there. It was just behind the place where we are.
On a day that we were on The Inflatable Island, we became very close the most to the lifeguards, especially to Kuya Chris, for one obvious reason, we've been with them for almost the whole day, even after our timeslot in the floating playground. These lifeguards has a lot of funny hugot lines for every obstacles, and everything we did on The Inflatable Island. Like for example on the monkey bars-like obstacle, they told us not to hold on if it already hurts us. So if we got a bit hurt due to slipping or anything, we just seemed to laugh off the pain because of their funny hugot lines. Kuya Chris on the other hand doesn't have a lot of funny hugot lines with him, but he was the one who guided us, and taught us how to pass all of the obstacles in The Inflatable Island.
Lastly, the nurse, Nurse Ruby, always ask if I'm fine whenever she sees me around, due to my minor wound because of my kakulitan. The staff of The Inflatable Island really takes care of us, their guest, and treat us like a part of their family. They even made us part of the making of their Christmas Tree by letting us write on the ornaments to be hung on it.
Accomodation
The Inflatable Island has an official hotel partner which is the Subic Peninsular Hotel. They offers package deals which includes discounted room and ticket rates which can be viewed and booked here. However, Subic Peninsular Hotel requires 5-7 minutes car ride from The Inflatable Island. If you prefer a nearer accomodation, you don't need to go out of the area as Samba Bluewater Resort offers accomodation which starts at P1000.00 for 2 persons in a non-airconditioned nipa hut, you may check their complete accomodation offers here. You may also want to check The Inflatable Island's accredited hotel list here which includes the following:
Going Home
There were blue jeepneys which were passing infront of The Inflatable Island that only costs P10.00 going to the Ulo ng Apo Rotunda, the Victory Liner Terminal is just infront of the rotunda. There were also buses and tricycles from The Inflatable Island but the jeepneys are the most common mode of transportation.
It was already night when we got to the terminal so we decided to eat our dinner before riding the bus. We want to have a number of choices so we went to Harbor Point, the Ayala mall of Olongapo City, only to end up eating at Tokyo Tokyo since we were already tired and hungry when we got there. The Harbor Point is less than 10 minute walk from SM Olongapo so its up to you what mall you want to go when you go there. The fare going to this malls from the Ulo ng Apo Rotunda is P60.00 via tricycle (whole tricycle rental), and P7.00 per person via jeepney. Make sure that you ride a yellow jeepney because it seems that the jeepneys of Olongapo City are color coded. There were a lot of jeepneys in the area so you don't need to worry going back to the terminal.
Summary
If you will be taking the morning pass at the floating playground which starts at 8:00 in the morning, you should be there not later that 7:30 in the morning to have an ample time for the orientation and your preparation, unless you get there with your swimming attires and sunblocks on.
Make sure that you secure your wristbands before leaving the ticket booth. These wristbands will serve as your ticket to enter the floating playground, floating zoo, and the Bali inspired lounge. Each wristband is color coded depending on your timeslot and the type of pass you avail in the floating playground. It must be kept worn all throughout your stay in the floating playground as it will determine when you should stop using the playground. Though it looks easy to break in water, don't worry about it too much as these wristbands were made of a special type of paper that don't easily get torn on water.
 |
| The Inflatable Island - Orientation Area |
Step One: Orientation
After getting your wristbands on the ticket booth, take a walk on the path provided by Samba Bluewater Resort, and follow the street signs which will lead you to The Inflatable Island. If you get lost, just ask the guards for directions, they are all over the area and they will willingly help you to get there.
The first thing you should do when you get there is to go to the orientation area where a facilitator will inform you the do's and don'ts, and other things you need to know in The Inflatable Island which includes but not limited to the following:
- Facilities: locker area, clinic, souvenir shop, and more
- Selfie sticks can be brought to the floating playground as long as it does not exceed 1 foot
- Any gadgets for taking pictures are allowed in the floating playground. But you will only bring this in your own risk, The Inflatable Island should not be liable if it was destroyed or drowned deeply in the water while in the floating playground.
- Clothing with buttons, zippers, or any other sharp objects are not allowed in the floating playground.
- All types of jewelries are not allowed in the floating playground
- The depth of the water of The Inflatable Island may go to as deep as 20 feet depending on the tide and weather.
- Diving is not allowed on the floating playground.
- Swimming under the obstacles of the floating playground is not allowed.
The orientation will only take less than 10 minutes. Afterwards, you should sign the waiver before going to the next step. This waiver will waive The Inflatable Island from being responsible when something unexpected happen due to someone's negligence of the rules or misconduct.
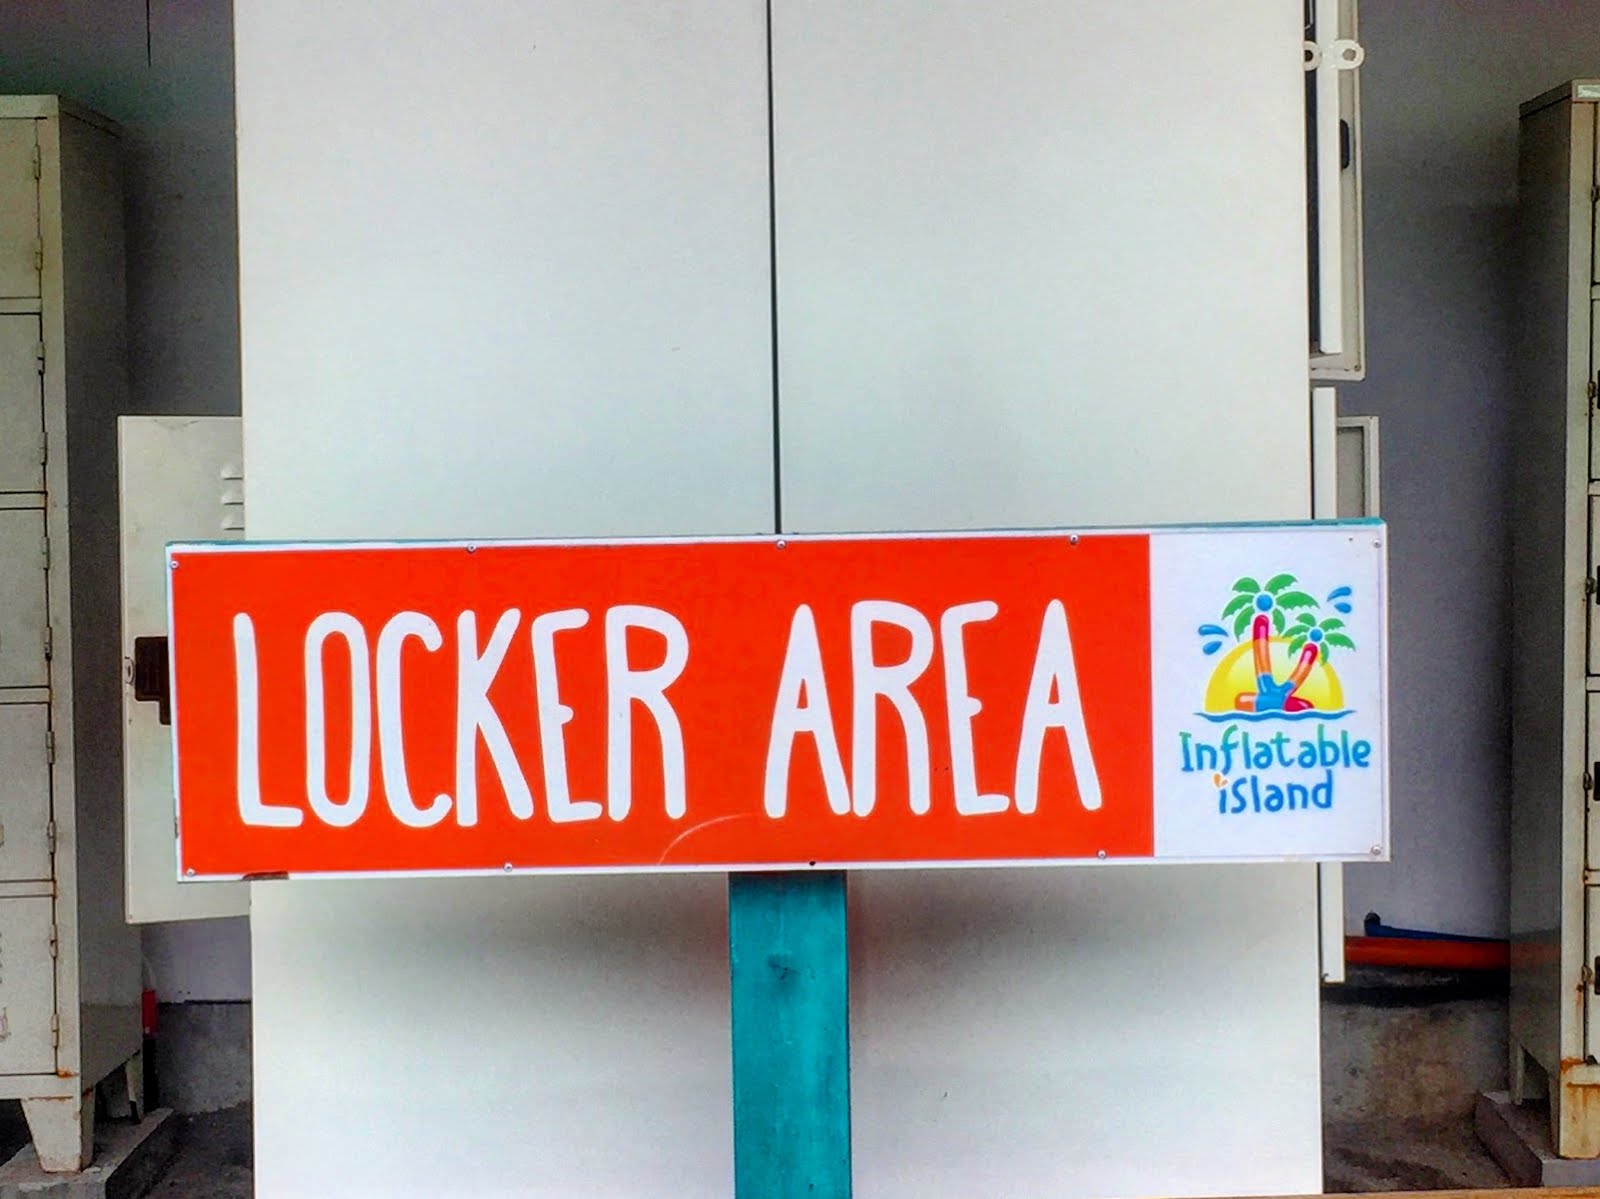 |
| The Inflatable Island - Locker Area |
Step Two: Secure Your Things
After your orientation, you can now secure your belongings in the locker. The locker area can be easily seen from the orientation area. These lockers can be availed however on the booth behind the locker area, besides the souvenir shop. Your facilitator can guide you where you can avail these lockers since the booth can't be seen from the orientation area.
 |
| The Inflatable Island - Small Lockers |
There were two types of lockers which can be rented in The Inflatable Island - the small lockers and the big lockers. If you brought a small bag with you, or you didn't brought a bag at all and you just want a secure place to leave your valuables such as wallet and gadgets, then a small locker might work for you. Else, if you brought a Herschel 25L bag like me, or any other bags with the same size or bigger, or you just want a big space to leave your belongings, then you should rent a big locker. However, bringing a bag bigger than mine is not advisable since I had a hard time to fit my bag on the locker, I have to remove some of its contents and put on the smaller divider of the locker just to fit my bag inside of it.
These lockers can be rented in two options - half day rental (four hour rental) or whole day rental -with the following prices:
- Small Locker
- Half day - P50.00
- Whole day - P100.00
- Big Locker
- Half day - P100.00
- Whole day - P150.00
 |
| The Inflatable Island - Big Lockers |
If you are worried about where to leave your keys when you are in the floating playground, worry no more as you can leave them secured on the booth where you rented the lockers.
Regarding your slippers, you can do the same thing that we did. We leave our slippers together with our towels, and sunblock on the Bali Inspired Lounge, this also secures us a slot for an umbrella in the lounge. There were some who leaves other things such as sunglasses on the lounge, this is just fine as there were really no rules on what things can you leave on the lounge but leaving valuable things on this area is not advisable, however, there were still some who leaves their whole bag in the lounge, you can also do this but in your own risk, anyway, there are security guards, staff, lifeguards, and other personnel around the area which made it a bit secured.
 |
| The Inflatable Island - Lifevest Area |
Step Three - Get Your Lifevest
Once you're done with the orientation, waiver signing, securing belongings, wearing proper outfit, and putting sunblock, its now time to go to the step three - getting your lifevests. This is the last step before going to the floating playground. The lifeguards in the lifevest area are there to help you wear your lifevests properly.
In this area, security guards and lifeguards will also check your: (1) attire if it is included in the proper attire for the floating playground, (2) your jewelries if there are any - it should be removed, (3) and the things you will bring in the floating playground such as selfie stick - it should not exceed 1 feet.
Official photographers of The Inflatable Island are also in this area to get some pictures of you while you are in The Inflatable Island. The photos they took can be bought in the souvenir shop, besides the locker rental booth, afterwards. A picture in a photo paper costs P100.00, while a photo magnet costs P150.00, you can also ask for a softcopy of your picture to them.
 |
| Awkward Mandatory Selfie at the Starting Point of The Inflatable Island |
Step Four - Enjoy!
Before actually doing the activities in the floating playground, you might want to stretch out first as there were some activities that might make you feel like working out and might give you body pains later, it will also help you prevent or atleast lessen the possibility of having cramps while in the water.
For me, the most ideal time to enjoy the playground is in the morning while the sun is not too hot which might make you feel exhausted easily. It will also give you the freedom to do what you want, with an ample time remaining later, after your timeslot in the floating playground, including taking of pictures while the natural lighting from the sun is still present.
Be friendly, especially to your lifeguards as they were the ones who will guide you on how to do a certain obstacle. They will also help you back to the floating playground when you fell on the water, take note that it is not an easy thing as there were no ladders that you can hold on to go back to the floating playground. These lifeguards will also make things lighter with their funny hugot lines that they come up in almost everything they see, so you better be friendly while you are there.
Here are my top 5 personal picks on the obstacle courses in the floating playground:
- The BFB (Big Freaking Blob)
- Giant Tarzan Swing and Slide
- Trampoline
- Rock Climbing
- The Log Runner-like (of American Ninja Warrior) obstacle near trampoline
To capture memories while you were in the floating playground, you better bring your action camera. Other gadgets for taking pictures such as phones are also allowed to bring in floating playground. However, I don't think that it is ideal to bring other gadgets on the floating playground as the playground is slippery, it might just end up being wet, or worse it might fall on the water that could go as deep as 20 feet. If you really like to bring your phones or other gadgets on the beach to get your pictures, I could only recommend to bring it until the floating zoo because the water there is still shallow. Bringing action camera doesn't also guarantee that your pictures and videos on The Inflatable Island are safe because it might also fall on the deep water under the floating playground, so to prevent this from happening - secure your cameras with a lace, better if you have floaters attached on your action camera, you can also bring an aquapod as long as it doesn't exceed to 1 foot. Don't also sacrifice the quality of your photos and videos by putting an anti-fog inserts in your action cameras. I forgot to do this that's why all things taken by my action camera were hazy. Others say that toothpaste, or even your own saliva might work as an anti-fog when under water. If you do not have an action camera, or you forgot to bring one, you can go to the souvenir shop as they are offering GoPro rental. These cameras are of limited numbers, and is on a first come first serve basis, however, when we went there, almost all of the guests have brought their own action camera so there is still an available unit until the last time I went to the souvenir shop area. They also sell (and/or rent? I'm not that sure about this) action camera's accessories, such as floaters, if you need one.
Though we were not able to do this when we went to The Inflatable Island, I saw that there were other water activities in the Samba Bluewater Resort that you might want to try out after enjoying the floating playground to make your trip even more worth it! I saw that there's a jetski, banana boat, and other related water activities.
At night, there were also fire dancers in the Samba Bluewater Resort which you might want to check out too!
 |
| The Inflatable Island - Clinic Station |
Stay Safe!
There were obstacles in the floating playground that requires safety precautions when doing because injuries may arise when not done carefully. Even though there were a lot of lifeguards around The Inflatable Island to guide us in every obstacle, it is still better to start precautions with yourself. But sometimes, there are some accidents that couldn't really be prevented, because accidents happen unexpectedly, that's why there is a clinic to give you first aid in case there were incidents like this. This clinic is not only for those who were involved in the accidents on the floating playground, if you have other medical concerns while you are on The Inflatable Island, don't hesitate to reach out the clinic no matter how small or big it is. I had a minor wound on the floating playground, and they really took care of me, one of the lifeguards even assisted me to go to the clinic to get my wound healed.
 |
| The Inflatable Island - Bali Inspired Lounge |
After your timeslot in the floating playground, don't go home yet, maximize your whole day pass in the Bali Inspired Lounge, Floating Zoo, and Samba Beach to relax. The reason why for me, the morning slot is the best time for the floating playground, is to enjoy the rest of the place without the time limiting you after your floating playground timeslot. Perhaps, there were a lot of Instagram worthy spot on The Inflatable Island, and just right after the morning pass the natural lighting brought by the sun is good, take advantage on it to level up your Instagram game while no one is limiting you.
Also, for me, a beach trip wouldn't be complete when you haven't get your skin tanned, so on the afternoon, while the sun was still up high, and my colleagues were resting under an umbrella on the Bali Inspired Lounge to protect their skins, I lay down on one of the floaties on the floating zoo to have a sunbathe and get my skin tanned equally having no tanlines on my arms.
 |
| A Fish Behind a Jellyfish Below The Floating Playground |
Cleanliness
The natural color of the beach sand there is gray which is the reason behind the dark color of the beach water. But if you look closely on the shallow areas of the beach, you can see that the water is very clean and clear. You can even see some water species there such as stingless jellyfish and other fishes which is a sign of the cleanliness of the water in there. Even on the shore, you will be able to see holes where small crabs came out when there is no people nearby. Don't worry about these crabs as they are also afraid of people, they go back to their holes when people go nearby.
 |
| The Inflatable Island - Shower room and Comfort room |
The Inflatable Island has a clean quick shower area good for atleast 12 persons. They also have a spacious building built for shower rooms, and comfort rooms. You might want to enter this building or a full shower after your day in The Inflatable Island. The shower rooms inside this building have separate cubicles from the comfort rooms. Both shower rooms and comfort rooms are well maintained when we went there, there were even personnel that were seemed to be assigned in maintaining the cleanliness of the area. The only dirt that we saw inside that building were sands brought by us when we entered there, but there were times that we were asked to clean our foot and slippers before entering the building to prevent the sand from coming inside when they just cleaned the area.
 |
| Store and Eatery near Samba Bluewater Resort's Villas |
Food and Drinks
Bringing outside food and drinks will require you to pay a corkage fee which starts at P500.00 for 1-7 persons. This is quite expensive as you can already buy a meal for 7 persons in that price. However, the foods and drinks inside The Inflatable Island are even more expensive, your P200.00 won't make you feel that you've eaten enough to make you full (or is it just me?) since this was just the price range of a serving of fries and a lemonade. This made us decide to look for other place to eat for our lunch. We went outside the Samba Bluewater Resort and The Inflatable Island but we only saw a small store, so we went back inside the resort and we saw a store and eatery near the villas of Samba Bluewater Resort which offers a meal for just P60.00. This store and eatery can be seen from the pathway of the resort.
The Staff
From the ticket booth staff up to the lifeguards, they were all friendly and accommodating! Since we arrived a bit too early, we have to wait for more than an hour before the ticket booth opens. So to let the time pass by, we had a chat with the security guards on the ticket booth and the entrance of the pathway to Samba Bluewater Resort and The Inflatable Island, little did we know the staff on the ticket booth already arrived and was ready to accept guests.
After getting our wristbands from the ticket booth, we went to The Inflatable Island but we could not see where the orientation area is. The man sweeping the dried leaves from the trees approached and asked us if we were finding for something, we said that we were finding the orientation area and he lead us the way there. It was just behind the place where we are.
On a day that we were on The Inflatable Island, we became very close the most to the lifeguards, especially to Kuya Chris, for one obvious reason, we've been with them for almost the whole day, even after our timeslot in the floating playground. These lifeguards has a lot of funny hugot lines for every obstacles, and everything we did on The Inflatable Island. Like for example on the monkey bars-like obstacle, they told us not to hold on if it already hurts us. So if we got a bit hurt due to slipping or anything, we just seemed to laugh off the pain because of their funny hugot lines. Kuya Chris on the other hand doesn't have a lot of funny hugot lines with him, but he was the one who guided us, and taught us how to pass all of the obstacles in The Inflatable Island.
Lastly, the nurse, Nurse Ruby, always ask if I'm fine whenever she sees me around, due to my minor wound because of my kakulitan. The staff of The Inflatable Island really takes care of us, their guest, and treat us like a part of their family. They even made us part of the making of their Christmas Tree by letting us write on the ornaments to be hung on it.
 |
| Samba Bluewater Resort Facade |
Accomodation
The Inflatable Island has an official hotel partner which is the Subic Peninsular Hotel. They offers package deals which includes discounted room and ticket rates which can be viewed and booked here. However, Subic Peninsular Hotel requires 5-7 minutes car ride from The Inflatable Island. If you prefer a nearer accomodation, you don't need to go out of the area as Samba Bluewater Resort offers accomodation which starts at P1000.00 for 2 persons in a non-airconditioned nipa hut, you may check their complete accomodation offers here. You may also want to check The Inflatable Island's accredited hotel list here which includes the following:
- The Reef
- Moonbay Marina Villas
- Seorabeol Grand Leisure Hotel
- Subic Coco Hotel
- Court Meridian
- Grand Hoyah
- Horizon Hotel
Going Home
There were blue jeepneys which were passing infront of The Inflatable Island that only costs P10.00 going to the Ulo ng Apo Rotunda, the Victory Liner Terminal is just infront of the rotunda. There were also buses and tricycles from The Inflatable Island but the jeepneys are the most common mode of transportation.
It was already night when we got to the terminal so we decided to eat our dinner before riding the bus. We want to have a number of choices so we went to Harbor Point, the Ayala mall of Olongapo City, only to end up eating at Tokyo Tokyo since we were already tired and hungry when we got there. The Harbor Point is less than 10 minute walk from SM Olongapo so its up to you what mall you want to go when you go there. The fare going to this malls from the Ulo ng Apo Rotunda is P60.00 via tricycle (whole tricycle rental), and P7.00 per person via jeepney. Make sure that you ride a yellow jeepney because it seems that the jeepneys of Olongapo City are color coded. There were a lot of jeepneys in the area so you don't need to worry going back to the terminal.
Summary
The Inflatable Island Ticket
|
P712.08
|
Bought from Travelbook for P2,136.24 for 3 persons
|
Bus Fare (Cubao to Olongapo)
|
P240.00
|
|
Breakfast at McDonald’s
|
P130.00
|
|
Bus Fare (Victory Liner Terminal Olongapo – The Inflatable Island Ph)
|
P18.00
|
|
Big Locker Rental
|
P150.00
|
|
Photos
|
P200.00
|
P100.00 per photo
|
Lunch at Samba Bluewater Resort Eatery
|
P60.00
|
|
Jeepney Fare (The Inflatable Island Ph – Victory Liner Terminal Olongapo)
|
P10.00
|
|
Tricycle Fare (Victory Liner Terminal Olongapo – Harbor Point Mall)
|
P20.00
|
P60.00 for the whole tricycle rental
|
Dinner at Harbor Point
|
P200.00
|
|
Jeepney Fare (Harbor Point – Victory Liner Terminal Olongapo)
|
P7.00
|
|
Bus Fare (Victory Liner Terminal Olongapo – SM North Edsa)
|
P220.00
|
|
TOTAL
|
P1967.08
|

Comments
Post a Comment